Creating perfect print-ready files in Ashford ensures that your final printed materials come out exactly as envisioned—clear, professional, and correctly aligned. Whether you’re designing leaflets, posters, business cards, or brochures, understanding the essential file preparation steps can make all the difference. As one of the leading local printers in Ashford, Printingprogress is here to guide you through each step of preparing files to avoid costly reprints or design issues.
Call us on 0800 999 1094 or email us at info@printingprogress.co.uk for expert support in optimising your artwork for printing.
At Printingprogress, we bring creative ideas to life with premium print solutions designed to support your personal or business success.
Understanding The Basics Of Printing File Preparation In Ashford
How To Prepare Print-Ready Files In Ashford: A Complete Guide
Follow this step-by-step breakdown for perfect print file setup in Ashford. These critical points ensure your file is technically ready and visually correct.
1. Choose The Right File Format
-
PDF (Print Ready): The safest and most reliable format for print. Embeds all fonts and ensures no layout shifts.
-
TIFF or JPEG: Acceptable for simple image-based prints, but less suitable for designs with text or layers.
-
AI/INDD/EPS: Vector-based files are excellent for logos or line art, but must be exported correctly.
2. Set The Correct Resolution
-
Use 300 DPI (dots per inch) as a standard for all print files. Anything lower may result in blurry or pixelated prints.
-
Avoid using web-resolution images (72 DPI) in your artwork.
-
Double-check linked images; they must also be at 300 DPI.
3. Apply Bleed And Safe Zones
-
Add a minimum 3mm bleed to each edge to prevent white lines from trimming errors.
-
Keep essential content (text and logos) within a safe zone—at least 5mm from the edge.
-
Bleed ensures colour or images run smoothly to the edge after trimming.
4. Use CMYK Colour Mode
-
Convert all files to CMYK (Cyan, Magenta, Yellow, Black)—the standard for physical printing.
-
Avoid RGB colours, as they’re screen-based and may print inaccurately.
-
For consistent branding, use Pantone colours if your printer supports them.
5. Embed Fonts And Outlines
-
Always embed fonts or convert text to outlines/curves to prevent font mismatches.
-
Ensure that licensing allows for embedding.
-
Check for missing fonts before exporting your final file.
6. Flatten Transparency And Layers
-
Flatten all layers to avoid any unexpected layout shifts during the printing process.
-
Transparency can cause errors in rasterisation—flattening ensures that all effects render properly.
-
Particularly important in flyer or poster design for print in Ashford.
7. Check For Overprints And Trapping
-
Overprint settings can cause elements to disappear or blend unintentionally.
-
Disable overprint unless intentionally used for spot colour effects.
-
Use trapping to allow a margin of error between overlapping colours.
Helpful Extras For Smooth Printing Experience
These are some additional tips for preparing print files in Ashford to enhance your output quality and workflow efficiency.
1. Include A Print-Ready Checklist
-
File format: PDF
-
Colour mode: CMYK
-
Bleed: 3mm
-
Resolution: 300 DPI
-
Fonts: Embedded/Outlined
-
Layers: Flattened
A checklist reduces chances of missing vital details in your print-ready file guide in Ashford.
2. Use Printer-Supplied Templates
-
Ask your printer for a pre-sized template.
-
Templates contain the correct dimensions, bleed, and margin guides.
-
They help ensure precise print file setup in Ashford and reduce revisions.
3. Avoid Using Borders On Trims
-
Borders near trim lines can highlight minor cutting misalignments.
-
If necessary, keep borders at least 5mm from the edge.
4. Create Variants For Digital Review
-
Design a web-resolution version for quick proofing.
-
Helps in reviewing content without large file sizes.
-
Useful for client approvals or internal team reviews.
5. Confirm File With Your Printer
-
Always confirm specs with Ashford’s community print experts.
-
Different printers may have slight variations in preferred formats.
-
Submitting a sample print job can prevent large-scale issues.
Why Print File Quality Matters To Neighbourhood Print Shops In Ashford
Maintaining high standards in print quality reflects your brand’s professionalism. Files that are poorly prepared can result in grainy images, misaligned text, or colour inconsistencies. With years of experience, neighbourhood print shops in Ashford like Printingprogress expect files to meet industry specs to ensure a quick turnaround and polished results.
Investing time in file preparation demonstrates respect for your own design as well as your chosen printer’s capabilities. It’s the best way to ensure that your message is conveyed clearly and confidently.
Prepare Your Artwork With Printingprogress In Ashford
Getting professional prints starts with properly formatted files. At Printingprogress, we specialise in making the print process smooth and efficient for businesses, creatives, and individuals across Ashford. Our team supports you from concept to completion—ensuring your files are truly print-ready. Whether you need guidance with bleed setup, resolution checks, or final file exports, we’re here to help.
If you want peace of mind for your next printing job, Printingprogress is your trusted partner in Ashford. Call us on 0800 999 1094 or email us at info@printingprogress.co.uk and let’s get your artwork ready for flawless print results.
FAQs
1. What does print-ready mean in file setup?
It means the file is correctly formatted and technically ready for production, with the right size, colour mode, resolution, bleed, and font handling.
2. Can I use Microsoft Word to prepare print files?
While possible, it’s not recommended for professional printing. Instead, use design software like Adobe InDesign or Illustrator for accurate design for print in Ashford.
3. Why is bleed important in printing?
Bleed prevents white borders from appearing due to trimming inaccuracies. It ensures colours and images reach the edge of the printed material.
4. Do all images need to be 300 DPI?
Yes, anything lower may appear pixelated or blurry when printed. Always use high-resolution images in your artwork.
5. Should I always outline fonts before submitting?
Yes, outlining fonts prevents font substitution issues on the printer’s side and ensures your typography remains as intended.

 Eco friendly, sustainably sourced recycled FCS certified print
 Takeaway Screens
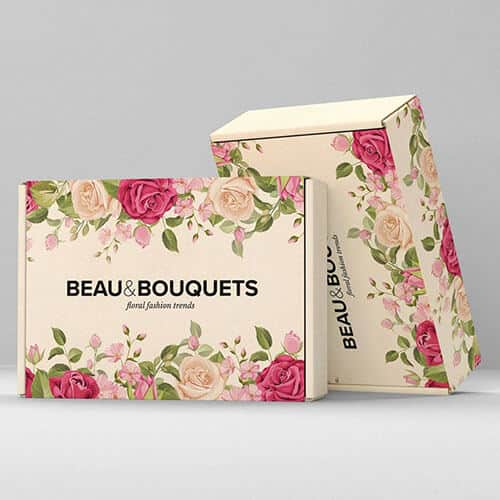 Postal Boxes