Understanding how to create print-ready files in Bermondsey is essential for achieving professional-quality results without delays or costly errors. Whether you’re designing flyers, business cards, brochures, or posters, your print file must be set up correctly for your printer to replicate your vision exactly as intended. That’s where we come in.
At Printingprogress, we’re here to ensure your design translates perfectly from screen to print. As local printers in Bermondsey, we help individuals and businesses alike streamline their printing file preparation in Bermondsey. Call us on 0800 999 1094 or email us at info@printingprogress.co.uk to get started today.
At Printingprogress, we turn your ideas into beautifully printed realities, file-ready, formatted, and flawless.
Understanding The Fundamentals Of Print-Ready Files
Key Steps For Perfect Print-Ready File Setup In Bermondsey
Getting your print file setup in Bermondsey right from the start ensures your finished product looks polished and professional. Here are the most essential points to keep in mind.
1. Use The Correct File Format
Always export your design as a high-resolution PDF, as it’s universally accepted by print shops. If not, you can also use formats like TIFF or EPS depending on what your Bermondsey printer prefers. Avoid formats like JPG or PNG for large print jobs.
2. Set The Colour Mode To CMYK
Printers use CMYK (Cyan, Magenta, Yellow, Black) colour model, not RGB. Designing in RGB may result in unexpected colour shifts. Always convert your design to CMYK before saving the final version.
3. Bleed And Safe Zones Are Crucial
Bleed is the area that extends beyond the final trim edge—typically 3mm. It prevents unwanted white edges. Likewise, keep important elements like text within the “safe zone” to avoid accidental cropping.
Tip:
Your design should extend 3mm beyond the trim size, and critical content should be placed at least 3mm inside the edge.
4. Ensure High Resolution
For crisp, sharp prints, images and graphics must be set at a minimum of 300 DPI (dots per inch). Low-resolution files result in blurry or pixelated prints. Don’t stretch small images to fit a larger canvas.
5. Embed Fonts Or Convert Them To Outlines
Missing fonts can alter your design completely. To avoid this, either embed fonts in your PDF or convert them into vector outlines so that your printer sees exactly what you see.
6. Flatten Transparency And Layers
Before saving the file, flatten all layers. This prevents any errors during the RIP (Raster Image Processor) phase and ensures nothing gets lost or misinterpreted.
7. File Size And Naming Convention
Name your file clearly (e.g., “BusinessCard_JohnDoe_PrintReady.pdf”). Keep the file size manageable, especially when sending via email or upload portals. Compress if needed, but do not compromise on resolution.
Advanced Design Tips For Flawless Print Results
Once the main file settings are sorted, pay attention to design elements that affect the finished product. These steps add finesse to your design for print in Bermondsey.
1. Choose The Right Colour Profiles
Use standard CMYK colour profiles like ISO Coated v2 for consistency in output across different printers.
2. Account For Fold Lines Or Creases
If your file involves folding (like menus or brochures), mark fold lines clearly but subtly—often as guidelines or spot UV.
3. Incorporate Vector Graphics Where Possible
Use vector files (.AI, .EPS, .SVG) for logos and illustrations. They remain sharp regardless of size, ideal for large formats.
4. Check Your Margins
Avoid placing important content too close to the edge. Aim for at least 5mm margin to maintain clean and balanced spacing.
5. Proof Everything Twice
Print a mock-up if possible. Double-check all elements—text, alignment, spelling, bleed, and images—before submitting to your printer.
Why Print File Preparation Matters In Bermondsey
Let’s explore why print-ready file guide in Bermondsey is a game changer for local businesses and designers alike.
1. Faster Turnaround Times
Well-prepared files mean your project goes straight to print—no time lost in revisions or file corrections.
2. Fewer Errors, Less Waste
Errors caught after printing waste paper, ink, and time. A clean file setup prevents this from the get-go.
3. Maintains Professional Brand Image
Whether it’s a poster, leaflet, or packaging, poor-quality prints reflect poorly on your brand. Proper setup ensures quality results.
4. Helps Neighbourhood Printers Work Efficiently
Supporting neighbourhood print shops in Bermondsey by submitting files in the correct format streamlines their process and enhances collaboration.
5. Ensures Consistency Across Print Runs
If you plan to reorder materials later, consistent file setup ensures your branding remains cohesive and unchanged.
6. Boosts Marketing Impact
Materials like business cards, event flyers, or banners with vibrant colour and sharp detail always create a better impression.
7. Reduces Costly Reprints
Correct formatting from the outset helps avoid mistakes that require costly corrections or complete reprints.
Choose Printingprogress: Bermondsey’s Printing Experts
Setting up print-ready files in Bermondsey might seem technical at first, but it’s a vital step for professional, hassle-free printing. From colour mode and resolution to bleed and font embedding, each element plays a role in achieving flawless results. Whether you’re a graphic designer, a business owner, or a local artist, you’ll benefit from following these tips for preparing print files in Bermondsey.
At Printingprogress, we are proud to be Bermondsey’s community print experts. We offer expert guidance and full printing services tailored to your project needs. From helping you design to reviewing your file setup, our team is here to make the process simple and stress-free.
Are you ready to bring your print project to life? Call us on 0800 999 1094 or email info@printingprogress.co.uk today to work with Bermondsey’s trusted printing specialists.
FAQs
1. What does print-ready mean in file setup?
A print-ready file is correctly formatted with bleed, high resolution (300 DPI), CMYK colour, and embedded fonts—ready to be sent directly to print without adjustments.
2. How do I make my file print-ready?
Use design software like Adobe Illustrator or InDesign, set CMYK mode, ensure 3mm bleed, embed or outline fonts, flatten layers, and export to PDF.
3. Can I use images from the web for printing?
Generally, no. Most web images are 72 DPI, which will appear pixelated when printed. Always use high-resolution images at 300 DPI.
4. What’s the best format for submitting a print file?
PDF is the industry standard for submitting print-ready files, but TIFF or EPS can also be acceptable based on your printer’s requirements.
5. Can you help me prepare my design for printing?
Absolutely. Printingprogress offers complete printing file preparation in Bermondsey. Contact us anytime for guidance or file reviews.

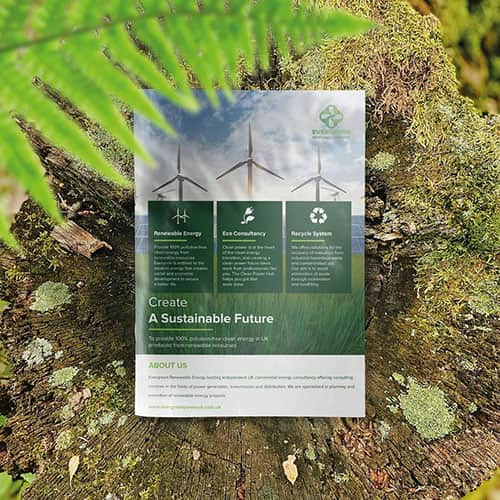 Eco friendly, sustainably sourced recycled FCS certified print
 Takeaway Screens
 Postal Boxes